The skeleton is posed and rigid. Now it gets skinned. The whole technique is one ply of cheap facial tissue laid into wet exterior wood glue, and it is unpleasant to do and extremely effective.
Step 7 — Glue and tissue, small area at a time
Pour a glob of wood glue onto a piece of scrap cardboard — cardboard rather than a palette, because it goes in the bin at the end and there is nothing to wash.
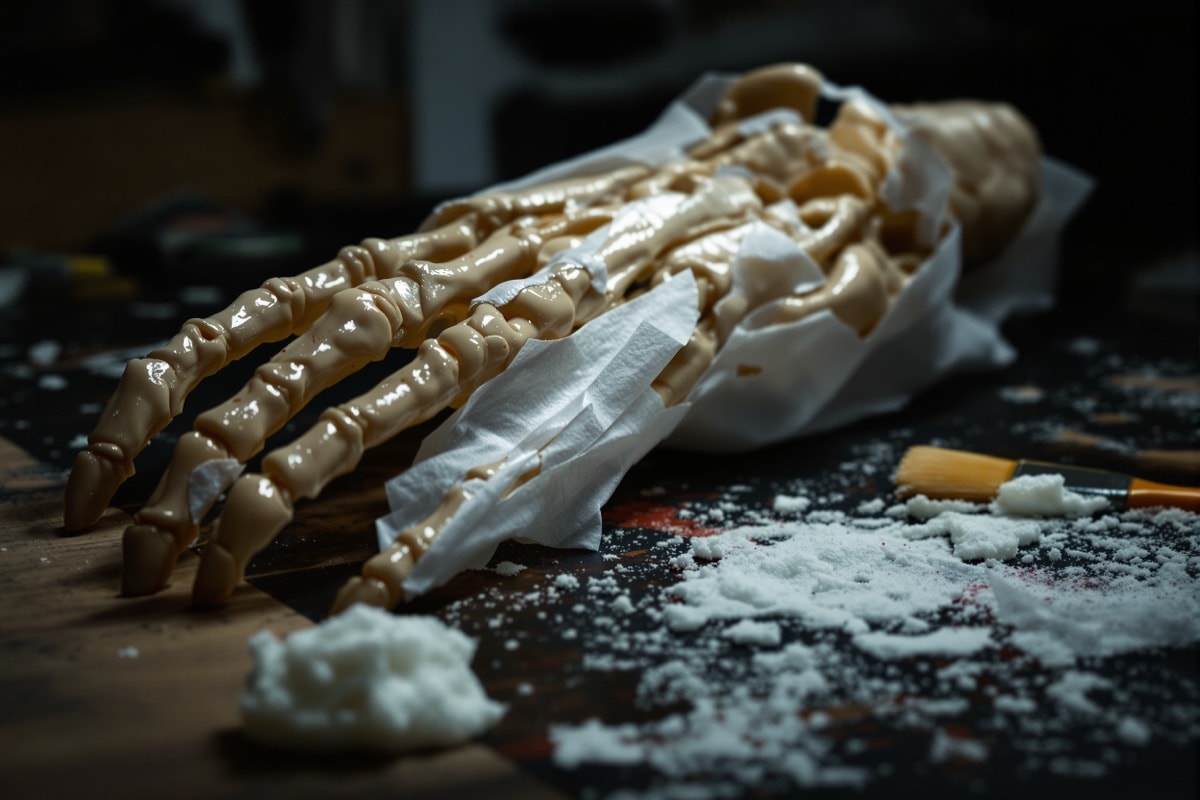
Brush the glue onto the skeleton with a 1 in brush, working an area of roughly eight inches square. Do not be sparing: it should be thick enough to start running down the figure. Runs are not a problem here, they are texture.
Take one sheet of the tissue and separate the two plies, setting the second aside. Single ply is the whole point — it is thin enough to be translucent when wet, so it takes the shape of what is under it and dries as a taut skin. Two-ply stays thick and reads as papier-mâché.
Lay the single ply into the wet glue. It will cling to your fingers about as much as it clings to the skeleton and it feels genuinely horrible. That is normal. Push it down loosely rather than smoothing it flat; wrinkles, folds and puckers are what make this look like desiccated skin.
Step 8 — Keep moving
As soon as one area is covered, move to the next and repeat. Work steadily around the whole figure. The tissue tends to bunch and glob in places, and it looks like a mess while it is wet — leave it alone. It dries dramatically better than it looks.
Vary the coverage deliberately. Areas with more layers and heavier bunching read as remaining flesh; areas with a single thin taut layer over bone read as skin stretched to nothing. A uniformly covered figure looks upholstered.
Step 9 — Let it look terrible
The half-skinned skeleton is the least promising-looking stage in the entire process. Everything is white, wet, lumpy and clearly made of tissue. Push on. The stain in step 12 is where it all resolves.
Step 10 — Why the small-area approach matters
Working in small patches rather than mixing a great batch of glue keeps the whole thing manageable. Only enough glue for the current area is ever poured, so nothing goes off half-used, and clean-up at the end is a brush in a cup of water and one piece of cardboard thrown away.
It also means the job can be put down and picked up freely — useful, because skinning a whole figure takes a few hours and there is no penalty for stopping.
Step 11 — Tendons over the joints
Before covering the wired joints — wrists, elbows, knees, ankles — coat the exposed wire with hot glue. This does two things: it strengthens the joint and locks the pose further, and it gives a surface the tissue can blend onto so the wire does not show as a hard line under the skin.
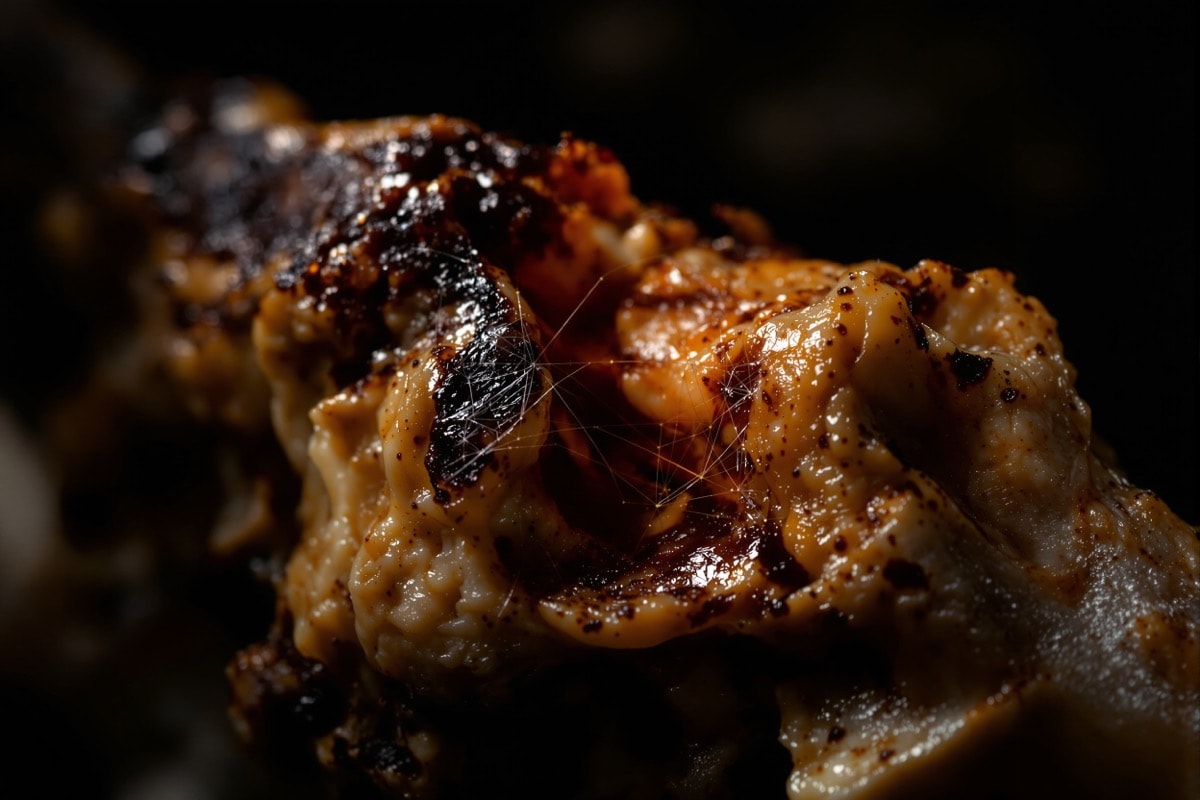
Then the trick that makes this method distinctive. Mix strands of fake spiderweb into the glue as you work over the joints and between the bones. Teased out thin and laid into the wet glue, it dries as fine, stringy, translucent fibres that read unmistakably as dried tendon and sinew. It is the single best detail in the whole build, it takes almost no extra time, and a small bag does several figures.
Concentrate it where tendons actually are — behind the knee, across the front of the ankle, along the forearm, under the jaw — rather than scattering it evenly.
Step 12 — Stain it
Let the figure dry for a full day before staining. Tissue and glue feel dry on the surface long before the layers underneath are, and stain over damp glue goes blotchy.
Then, with a 1 in foam brush, apply wood stain to a small section and wipe it straight back off with a soft cloth. Do not let it sit. The stain grabs in the puckers and the cracks and in the fibres of the tissue, and lifts off the raised areas — leaving the bones a sickly brown while the recesses go dark. It is the same wash-and-wipe principle as the ink on cheap skulls, in a warmer palette.
The variation between brown and yellow across the surface is what makes it look convincingly rotten. Work all the way round the figure section by section.
Final step — Seal it
Finish with a heavy coat of sealant brushed over the whole figure. This is not optional if the corpse will be outdoors: the skin is paper and glue, and unsealed it will soften in the first heavy dew. Sealed, it survives a season in a yard and many years in storage.
Variations
Everything above assumes a figure posed on the ground. A free-standing corpse — walking across a lawn — needs a genuinely different construction, with a rigid internal spine such as a length of pipe or rebar running from a ground stake up through the pelvis and torso, rather than wired joints alone. The skinning and staining are identical; only the armature changes.
Other things worth trying with the same skin: a corpse hung in cheesecloth like an oversized spectre; a partial corpse of torso and arms only, half buried among tombstones, which is quicker and reads better than a whole figure; and a stronger green in the stain for something that has been in water rather than earth.