
Making a good corpse from cheap materials
Most corpsing tutorials look like they need an engineering degree and a budget. They call for gallons of latex, or twenty layers of papier-mâché, or a workshop full of preparation. This one does not. The method here uses a cheap blow-moulded skeleton, a bottle of exterior wood glue, a box of the cheapest facial tissue on the shelf and a can of wood stain, and it produces a genuinely convincing corpse for around fifteen dollars.
There are two problems to solve and they are separate. The first is that a discount-store skeleton is hollow, flimsy and unposable — the limbs dangle and it can only ever hang. The second is that it is shiny cream plastic. This page fixes the first problem, and part 2 fixes the second. Do them in that order: skinning a figure and then trying to pose it destroys the skin.
Materials
| Item | Notes |
|---|---|
| Cheap blow-moulded skeleton | The hollow plastic kind sold in discount stores for around fifteen dollars, less out of season. |
| Exterior wood glue | A tube or bottle. Interior/exterior grade is worth the extra — it bonds better and resists mildew, which matters if props live in a basement. |
| Hot glue, high-temperature sticks | Sticks are used as structural plugs as well as adhesive. |
| Small eyelet screws | Two per joint, plus larger ones for the pelvis and torso. |
| Craft or floral wire | A spool. Medium gauge for the joints, lighter coated wire for lashing. |
| Cheap two-ply facial tissue | A box makes several skeletons. |
| Fake spiderweb | A small bag. Used for tendons — see part 2. |
| Wood stain and sealant | Part 2. |
| Two 1 in brushes, wood screws, utility shears, a dental pick | Tools. |
Useful quantities, worked out the hard way: one bottle of wood glue does roughly two and a half skeletons, and a single box of tissue will do a great many.
Building the armature
Step 1 — Replace the plugs with glue-stick posts
Take the skeleton apart at the joints and pull out the moulded plastic plugs that connect the bones. They are what makes the figure floppy and they are useless.
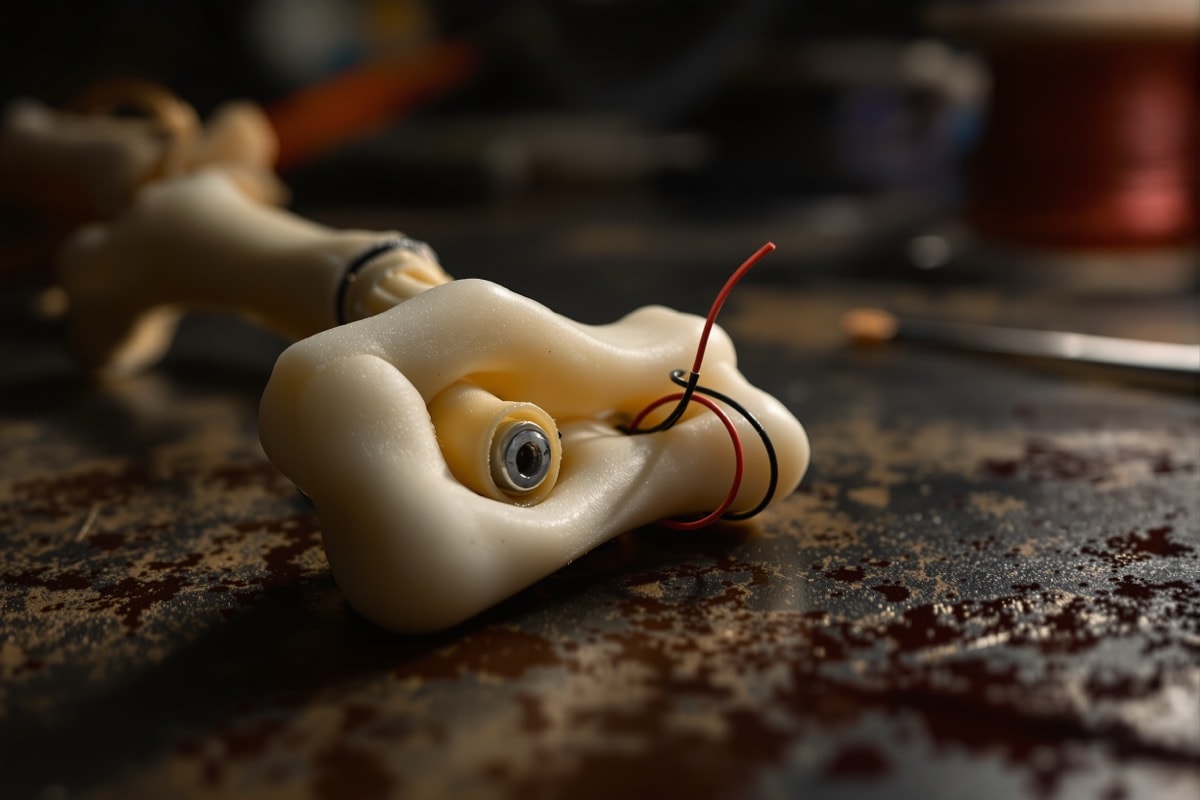
Cut 2 in lengths of high-temperature glue stick with utility shears. Put a little hot glue on one end of each and push it into the socket in the bone, leaving about a quarter of an inch standing proud.
The reason this works is worth understanding: a glue stick is solid, it takes a screw thread without splitting, and hot glue bonds to it perfectly because it is the same material. A wooden dowel would split; a plastic rod would not bond. Do this for every bone in the arms, legs, hands and feet.
Step 2 — Screw an eyelet into each post
Screw a small eyelet into the end of every glue-stick plug. These eyelets become the connection points for the whole skeleton — a pair of them facing each other at a joint is what the wire will pass through.
Do not overtighten. The stick will grip a screw firmly but will deform if forced.
Step 3 — Handle the big sockets
The pelvis and the base of the torso have much larger holes than the limb bones. Glue two sticks together side by side and use the pair as a single fatter plug for each.
Fit bigger eyelets to these two — they carry the entire weight of the figure and every load path runs through them.
Step 4 — Wire the skeleton together
Reassemble the figure by running medium-gauge wire through each pair of facing eyelets and wrapping it until the joint feels solid. More turns means a stiffer joint; fewer means a looser one. It is worth varying deliberately — hips and shoulders want to be stiff, wrists and ankles can stay loose.
Step 5 — Accept what this gets you, and pose accordingly
At this point the skeleton is posable but not lockable. It will hold a position, but it will not stand up unsupported and it will settle under its own weight over an evening. That is worth knowing before designing a pose, and it is the reason the next choice matters.
The way around it is to choose a pose that is inherently stable — one where the figure's weight is carried by the ground rather than by the joints. A skeleton sitting up, as though rising out of the earth, is the classic answer: the pelvis and legs are on the ground, the torso leans back on itself, and nothing is cantilevered. Kneeling, slumped against a wall, or crawling all work the same way. A free-standing walking figure does not, and needs a different construction entirely.
Having chosen the pose, secure the figure to the work table with wood screws through the hands and feet. Fixing it down while you work is what stops the pose drifting as you add weight to it — and everything from here on adds weight.
Step 6 — Lock the pose
Wire alone will not hold the torso where you want it. Run a wood screw through the rib cage into the pelvis to fix the angle between them, which is the joint under most load in a seated pose.
Then, anywhere else that still moves, punch through with a dental pick and lash the parts together with light coated craft wire. Work round the whole figure testing joints and lashing whatever gives. By the time you are done the skeleton should hold its shape when lifted by the shoulders.
Why this method rather than latex or mâché
Latex means gallons of expensive material and a serious ventilation requirement. Papier-mâché means many layers, long drying times and a real mess. Both work; neither is cheap or quick.
The alternative used here is a variation on tissue-and-glue mâché: a single ply of cheap facial tissue laid into wet exterior wood glue. It goes on in small areas, dries in a day, needs no preparation, and clean-up is a brush in a cup of water and a piece of cardboard in the bin. The finished skin is thin, papery and puckered — which is exactly the texture desired, and one that smooth mâché does not give.
The skeleton is now a rigid posed armature. Continue to part 2 — skinning and staining.